How-to guidesYouTube vlogs
How to Edit Vlogs for YouTube
YouTube judges a vlog on whether people keep watching. That changes the edit: the best moment moves to the front, slow stretches get cut harder, and the same project feeds Shorts that bring viewers back to the long video. This guide covers what a YouTube vlog needs that a vlog for friends does not.
The short answer
Start with a hook: the most interesting moment of the vlog, shown in the first 30 seconds. Then tell the rest in order at a length you chose on purpose, usually 8 to 15 minutes. Add chapter titles, get a second opinion on pacing before you publish, pull a thumbnail frame, and cut two or three Shorts from the same footage. Eddie does each of those from a prompt.
What you will end up with
- A cold open that shows the best moment of the video in the first 30 seconds.
- A 10 to 12 minute main edit, cut tight, with chapter titles at each new location.
- Timestamped notes on where the pacing drops, before you publish.
- A still frame for your thumbnail and two vertical Shorts from the same footage.
Step by step
Step 1
Import the episode
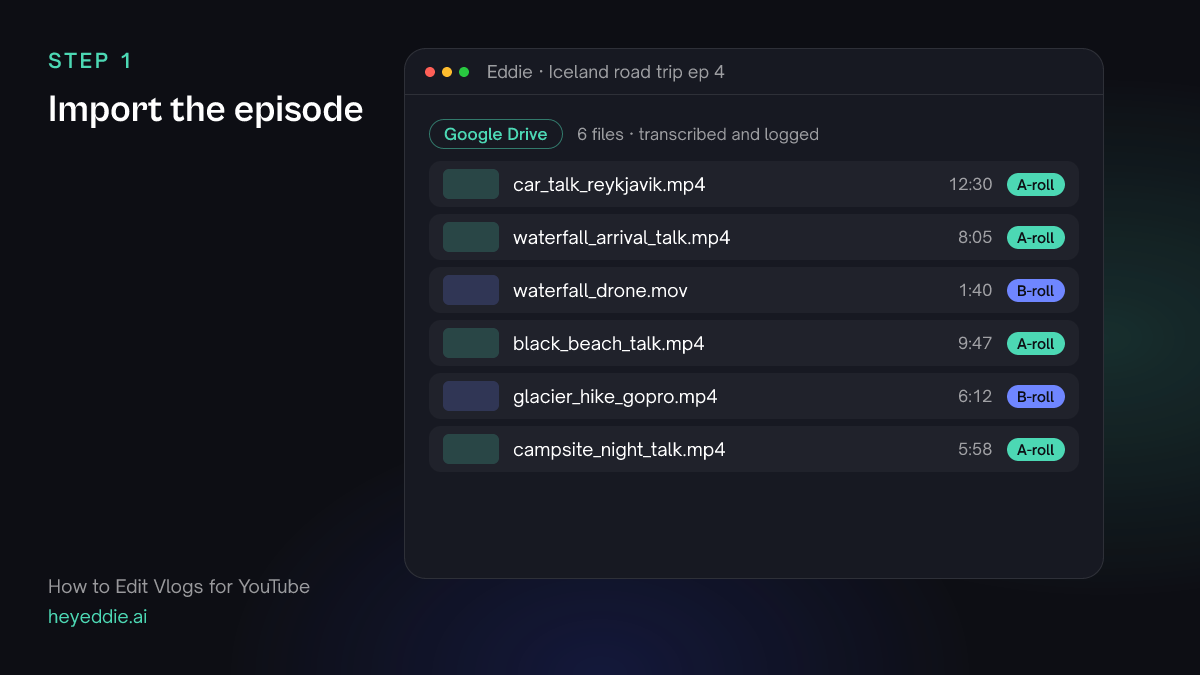
Upload the episode's footage or pick it from cloud storage. A YouTube vlog often has 40 minutes or more of talking; that is fine. Eddie transcribes it all, so you can search it before you cut.
What Eddie does
- Transcribes every talking clip and logs every b-roll clip.
- Proposes a target length from how much footage you have.
What you get: The whole episode, searchable by what was said and what was filmed.
Step 2
Build the cold open and the main edit
Ask for the hook and the length in the same prompt. The hook is the moment a viewer would describe to a friend. The length is a decision, not a leftover: name it.
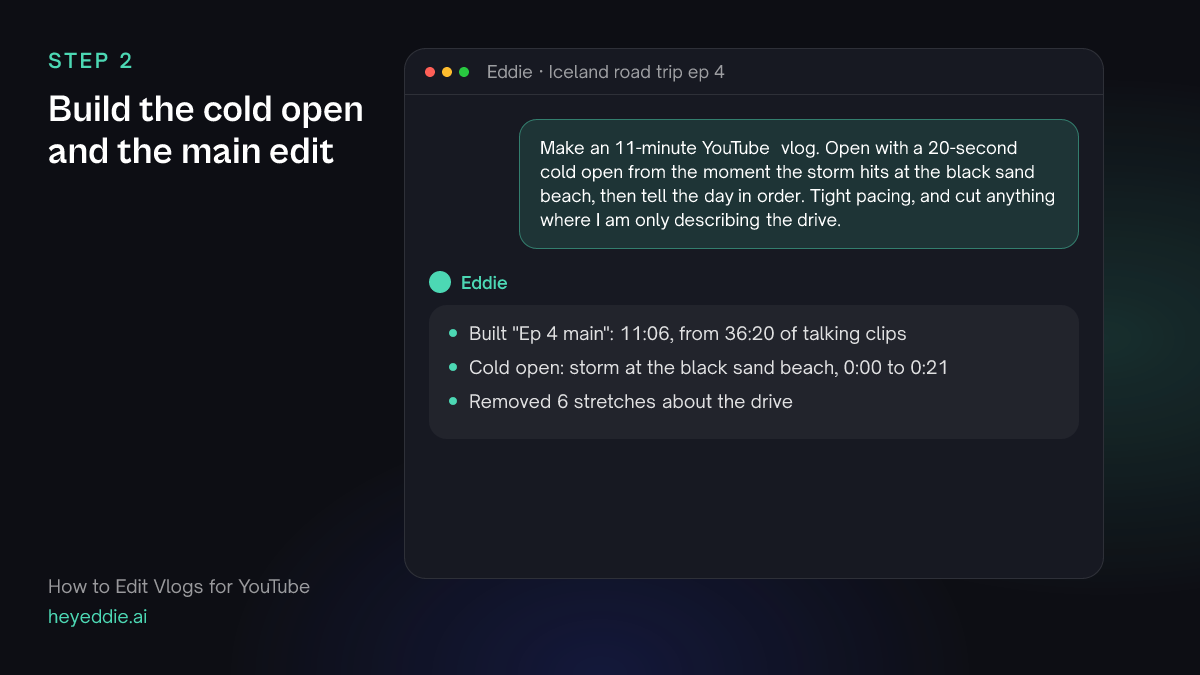
What you type “Make an 11-minute YouTube vlog. Open with a 20-second cold open from the moment the storm hits at the black sand beach, then tell the day in order. Tight pacing, and cut anything where I am only describing the drive.”
What Eddie does
- Builds the cold open from the moment you named, then the day in order behind it.
- Cuts to the 11 minutes you asked for and reports how much footage it used.
What you get: A main edit with a hook, at a length you chose.
Step 3
Add chapter titles
A title at each new place helps viewers who skip around, and gives you the chapter names for your YouTube description.
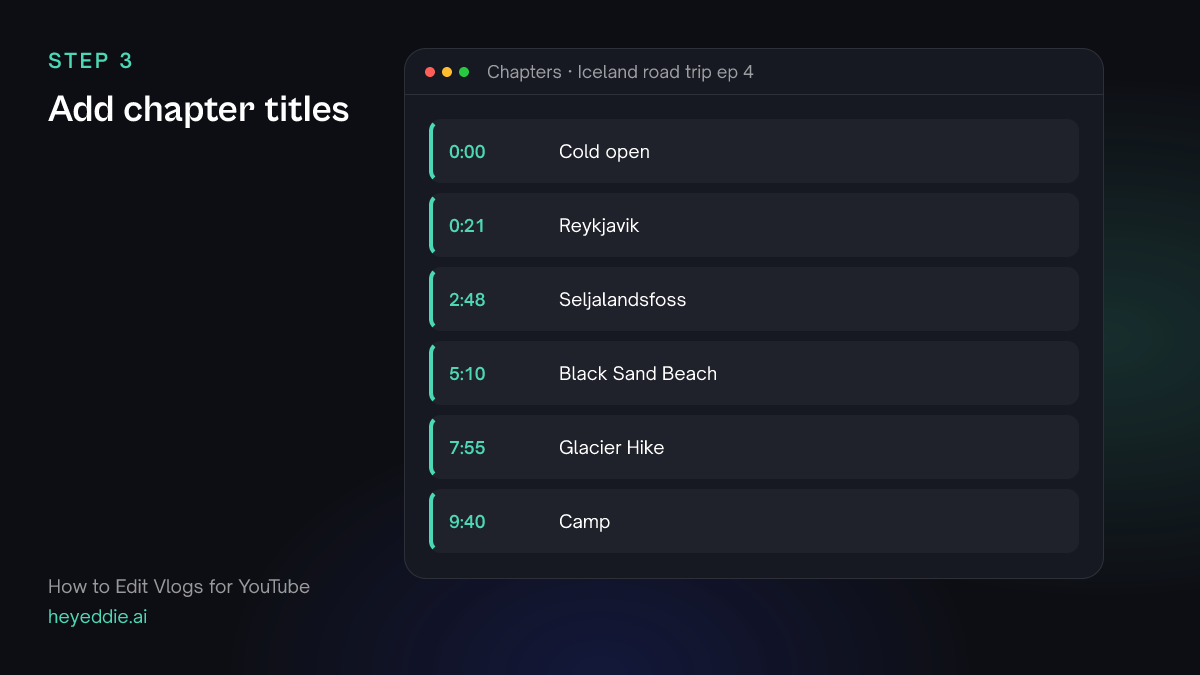
What you type “Add a title at the start of each location: "Reykjavik", "Seljalandsfoss", "Black Sand Beach", "Glacier Hike", "Camp". Big text near the top, fading in. Then list the timestamps so I can paste them into the YouTube description.”
What Eddie does
- Places each title at the first shot of its location.
- Reads the titles back with their times, which you can copy into the description as chapters.
What you get: On-screen chapters and a ready list of timestamps.
Step 4
Get notes on pacing before you publish
You have watched your footage too many times to judge it fresh. Ask for an editorial pass that says where attention will drop.
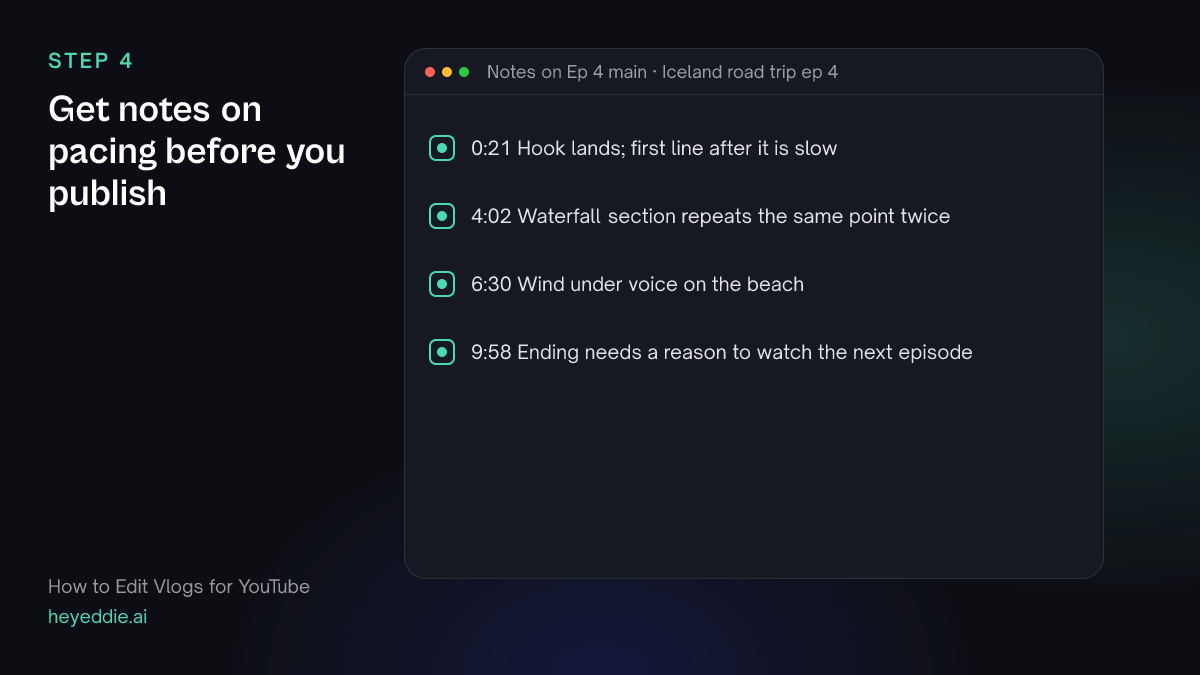
What you type “Watch the main edit and give me notes on the hook, the pacing and the audio, with timestamps. Leave the notes as comments on the timeline.”
What Eddie does
- Renders the edit and has a video-understanding model review the story, pacing, hook and audio.
- Leaves each note as a comment at its timecode, so you can fix them one by one.
What you get: A list of the slow spots, before your audience finds them.
Step 5
Pull a thumbnail frame and cut Shorts
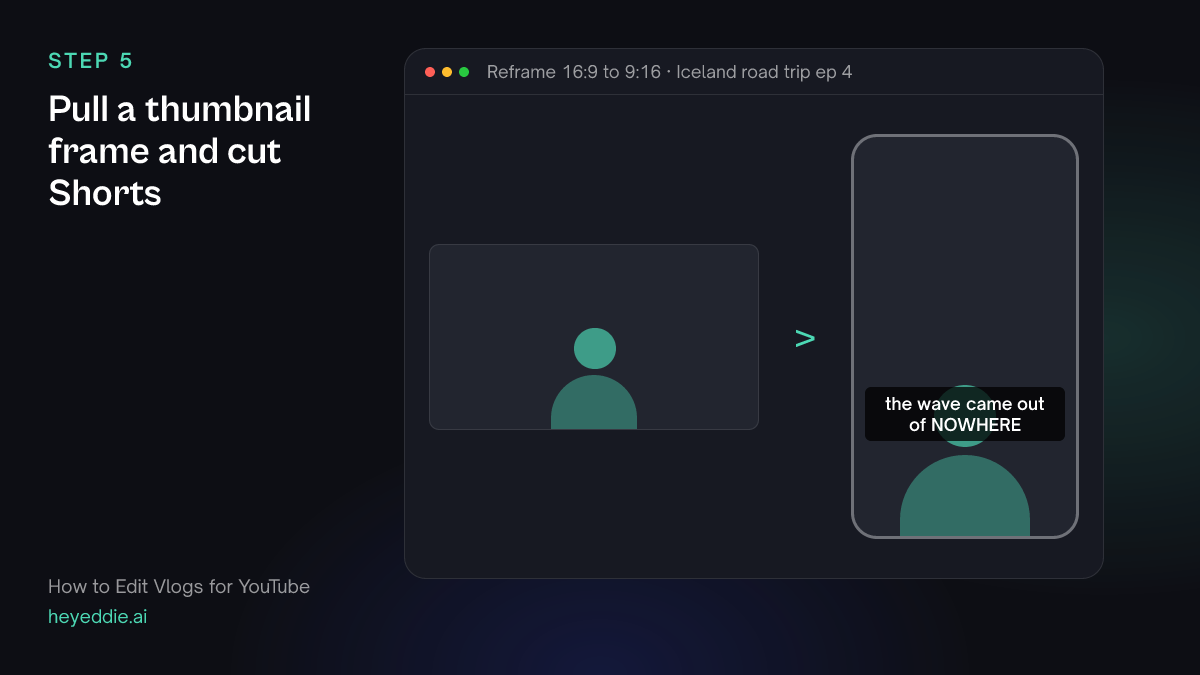
The same project gives you the thumbnail still and the Shorts that send viewers to the long video.
What you type “Export a still of the frame where the wave hits at 5:42 for my thumbnail. Then make two 40-second vertical Shorts: the storm at the beach and the glacier crack, each with captions.”
What Eddie does
- Exports the frame as a JPEG at the edit's frame size.
- Builds each Short as its own edit with a 9:16 canvas, a crop on you, and captions.
What you get: A thumbnail source image and two Shorts ready to upload.
Step 6
Export for upload
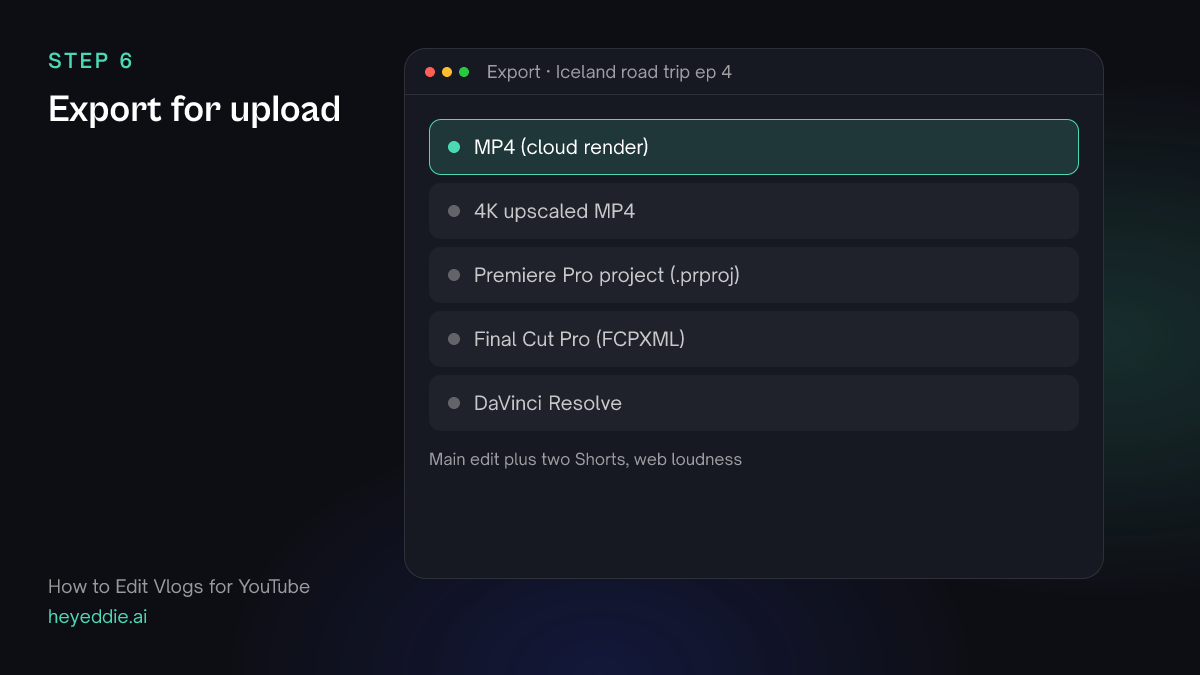
Export at the resolution you shot. If you filmed in 4K and want YouTube's higher-bitrate 4K stream, Eddie can upscale the whole cut to a 4K file.
What you type “Export the main edit as an MP4 with web loudness, and the two Shorts as MP4s.”
What Eddie does
- Sets the final loudness for the web and renders each edit in the cloud.
- Gives you a download link for each file.
What you get: Three files ready for YouTube.
What makes it work
- The first 30 seconds decide the video
- Show the payoff before the setup. A cold open from later in the day, then a line like "but first, how we got there", keeps people through the slow start.
- Choose the length before you cut
- Ten minutes of strong material beats twenty minutes of everything. Tell Eddie the length; it changes how hard the cut is, not just where it stops.
- End on a reason to keep watching
- The last 20 seconds should point to the next episode or a related video. Ask Eddie to end on a line where you tease what is next.
- Shorts are trailers, not leftovers
- Pick moments that make sense with no context and end on a question the long video answers.
Questions
- How long should a YouTube vlog be?
- Long enough to hold the story and no longer. Eight to fifteen minutes is common for travel and daily vlogs. Name your target in the prompt and Eddie reports the finished length against it.
- Can Eddie write my YouTube chapters?
- Eddie places chapter titles in the video and reads them back with their timestamps, which you paste into your description. It does not publish to YouTube for you.
- Can Eddie design my thumbnail?
- Eddie exports a still of any frame you choose as a JPEG. Design the text and layout of the thumbnail in your usual image tool.
- Can I get feedback like a YouTube editor would give?
- Yes. Ask Eddie to review the edit and it returns notes on story, pacing, hook and audio with timestamps. You can also add a retention-focused agent from the Eddie agent marketplace.