
On this page
In Summary A paper edit is a document. A rough cut is a timeline. The step between them is the one that eats your first day, and it is the step that should be automated. Eddie builds the assembly from soundbites you or the model choose out of the transcript, honours the clips you already rejected, and hands you a sequence you can play and then argue with.
The short answer
Every interview edit starts the same way: read everything, mark what is good, put the good bits in an order. The reading and the marking are editorial. The bit in the middle, finding each chosen line back in the footage and dragging it onto a timeline, is clerical, and it is where the day goes.
Transcript-driven editing removes only the clerical part. You still choose. The difference is that "the line about her first day" resolves to a real in and out point instead of a note in a document you now have to execute.
If you want the theory of the paper edit first, we wrote that up separately: how to create paper edits from interviews.
The footage in this walkthrough
Three interviews with Jessica Hernandez and her daughter Alizé, who run Simply Men's Barbershop in West Chester, PA, a mother-and-daughter business that came together during covid.
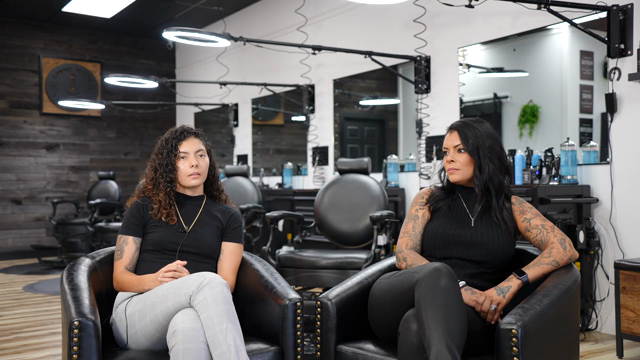
- 3 interviews, 8:20, 24:59 and 30:38, 1 hour 4 minutes total
- 13,675 words of transcript once processed
- 3 speakers identified across the three files, plus interviewers
Three files is the detail that matters for a rough cut. The story is not in any one of them. The best answer to a question in interview one is often given better, thirty minutes later, in interview three, and finding that by hand means holding two transcripts in your head at once.
Step 1: Read the transcripts, all of them
Start with the source list, then the transcripts. On a long project you do not want the whole thing at once: a single source comes back in pages of 200 segments (500 maximum), and you can page through with an offset or fetch just a time window. To find something specific, search one source by text and get back matching segments with their index and timestamps, up to 50 by default and 200 at most.
That page size is not trivia. It is why this works on a feature-length project and not just a demo: the model reads what it needs rather than choking on an hour of talking.
Step 2: Say what the video is for
The prompt that built the cut on this footage:
Create a story about Alizé's journey as a female barber in a mostly male field.
No timecodes, no clip names, no structure. The model reads all three interviews, picks the moments that carry that particular story, and puts them in an order that builds.
The prompts that work name the purpose and the audience. The prompts that fail are the ones that name a vibe: "make it good", "make it cinematic". Those give the model nothing to select on, and selection is the entire job.
Step 3: Understand how a soundbite is matched
Each soundbite in the assembly is targeted one of three ways, and knowing which is which will save you an argument later:
- By segment index. The most precise, and the one to insist on when it matters.
- By a quoted line of text. Fuzzy matched, so it does not have to be verbatim. Eddie reports how each soundbite matched and flags weak or low-confidence matches rather than quietly using them.
- By in and out times in seconds.
The fuzzy path is convenient and it is the one that can bite you: a phrase that recurs across three interviews can resolve to the wrong instance. That is exactly why the match report exists. If a line is load-bearing, pin it by index.
The edit gets a short unique name, one to three words. Names that do not fit are normalised rather than rejected, so an edit never fails to be created over punctuation.
Step 4: Your review marks are respected
If you have already been through the footage marking clips, that work is not thrown away:
- Rejected segments are hard excludes. They are dropped from any assembly, and the response tells you how many were dropped. You cannot accidentally build a cut out of material you already killed.
- Favourited segments are a strong preference. They get reached for first.
Both are visible before the cut is built, so the plan is honest rather than corrected after the fact.
Step 5: Watch it, then give notes
You get a timeline you can play. Treat the first version as an assistant editor's pass, because that is what it is:
- "The opening is slow, start on the line about her first day."
- "You used the same anecdote twice, keep the better read."
- "Take 30 seconds out of the middle."
- "Add the covid section to the end of that cut."
Each note is another prompt. Extending an existing cut appends to it rather than rebuilding it, so the b-roll and everything else you have already set stays put. Nothing is destructive, and you are not paying for a render to change your mind.
If you want a second opinion rather than your own, Eddie can render the cut and have a video-understanding model actually watch it: story, pacing, the hook, a cut list with timestamps, audio problems, and the three things to do next. It can post those as timestamped comments pinned to the timeline where each one applies. That one is metered rather than free: roughly 4 to 5 credits per minute of the cut plus about 7 fixed, so a one minute cut is around 11 credits and a ten minute cut around 50. Re-reviewing an unchanged cut returns the cached result for nothing.
What it will not do
- It reads words, not performance. The transcript does not record that the second take was warmer, that she welled up, or that the first answer was said to the floor. It cannot choose the better read for you, and if you tell it to keep "the better take" it will guess from wording alone.
- It does not watch every frame. It samples frames on request. A soft take, a boom in shot, somebody crossing behind: those are yours to catch.
- Dialogue-led footage plays to its strengths. Interviews, podcasts and testimonials work well because the story is in what people say. A wordless montage is possible and you will be steering far more of it.
- A repeated phrase can match the wrong instance. Fuzzy matching is a convenience, and the confidence warnings exist because it is not infallible.
- The last 10% is still yours. Colour, mix, titles and taste happen in your NLE, which is why the export path matters more than the render.
FAQ
Does building the rough cut cost credits? No. Reading transcripts, creating an edit, appending to it, renaming it and exporting it are all free. The metered things are the ones that generate media: an AI review that renders and watches the cut, generated music, voice-over, stabilisation.
How long can the cut be? The assembly itself is not the constraint. The AI review tops out around 40 minutes of cut, and cloud MP4 renders are capped at 10 minutes of output. NLE timeline exports have no such cap.
Can I build several different cuts from the same interviews? Yes. Each is a separate named edit over the same sources, and they do not interfere with each other.
Does this work from ChatGPT or Claude? Yes, over the same MCP connector. See how to edit video with ChatGPT and how to edit video with Claude.
What do I do about all the "um"s? Clean the source first, then build the cut. That order matters, and the reason is in how to remove filler words from an interview.
The barbershop shoot is the demo project inside Eddie, so you can build this exact assembly on the identical footage. Open it and prompt it.